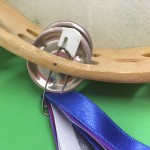
Ribbons not only add an element of fun to your tambourine, but are important in correctly weighting it. If I am working out a performance piece or I am creating a new movement and for some reason I only have a tambourine that has no ribbons on it, I would prefer to wait until I had a tambourine with ribbons before proceeding. Infact, many years ago I did use a ribbonless tambourine to create several new movements only to find that they didn’t real ‘work’ once I tried them out with a tambourine with ribbons!
At Timbrel Praise here in Hong Kong we have gone through numerous ribbon arrangements and ways of doing ribbons. It all started with ribbons sewn onto the centre 5 sets of jingles. This was heavy, but the impact when watching was great! We have now toned it down and recommend one set of ribbons attached to the centre jingle.
The traditional “Timbrel Praise” ribbon colours are as follows (around 1 cm each): 2 blue, 2 purple, 2 silver, 1 white and 1 red in the following order:
- 1 blue
- 1 purple
- 1 silver
- 1 red
- 1 blue
- 1 purple
- 1 white
- 1 silver
These are then folded into two before attaching to your tambourine, with the blue on top.
This colour scheme is the Timbrel Praise scheme, but you can come up with any variety of ribbons that you want!

There are a number of ways you can attach the ribbons, as follows:
Safety Pin
Fold your ribbons over and put a safety pin through the top of all layers of ribbons. You must use a safety pin as a regular pin is likely to come undone very easily. The safety pin should be replaced when bent.


Needle and Thread
Thread the ribbons around either the rim of your tambourine by the centre jingle or the post holding the centre jingles in place, and then sew the ribbons together using a colour of thread similar to your top ribbon colour.
Binder Rings
Fold the ribbons in two and sew about 1cm down from the top. Loop a binder ring through the ribbons and through the centre set of jingles on your tambourine. This either works great or ends up always coming apart.
Snaps
Fold the ribbons in half and sew each side together about 1cm down from the top. Then either sew or use a press/pliers to attach snaps onto each side of the ribbons (depending on type of snaps). Slip ribbons through centre jingle of your tambourine and snap to secure.
Tie a Knot
Loop the ribbons through the centre jingle and tie a knot. You may have to tie several smaller knots in order for it to look acceptable.
Important!
After you cut your ribbons, you will need to seal the ends to prevent fraying. There are several ways you can do this:
- Apply a line of clear nail polish on the cut area of the ribbon, both front and back. Allow to dry.
- Use a lighter to seal the bottom of each ribbon.
- Sew up the bottom of each ribbon (not recommended – too time consuming!).
